Common mistakes that damage upholstery during DIY cleaning
DIY upholstery cleaning sounds straightforward. A bit of spray, a cloth, maybe a brush, and you're done - except upholstery is rarely that forgiving. One wrong move can leave water marks, distorted fibres, faded colour, or a smell that seems to settle in and refuse to budge. And once the damage is done, it can be awkward and expensive to undo.
This guide breaks down the common mistakes that damage upholstery during DIY cleaning, why they happen, and how to avoid them. If you're trying to freshen a sofa, armchair, dining chair, or even a fabric headboard, the details matter. They really do. A careful approach protects the fabric, the filling, and the finish, while a rushed one can turn a small spill into a bigger problem.
We'll cover the most common pitfalls, the safer cleaning steps to follow, the tools worth using, and when it makes sense to stop and get professional help. Truth be told, a lot of upholstery damage starts with good intentions.
Why Common mistakes that damage upholstery during DIY cleaning Matters
Upholstery is not just "soft furniture". It's a mix of fabric, thread, foam, batting, and often glue or backing materials hidden underneath. When you clean it badly, the problem may not appear immediately. Sometimes the sofa looks fine at first, then dries with dark rings, stiff patches, or a slightly rough texture. By the next morning, you may realise the colour has shifted too. Lovely.
Why does this matter so much? Because upholstery is meant to be used every day. It absorbs body oils, dust, food crumbs, pet hair, and the occasional coffee spill. That makes regular cleaning sensible, but only if the method suits the fabric. A one-size-fits-all approach is where people get caught out.
In practice, the biggest risks are:
- Permanent staining from products that react badly with dyes or finishes
- Water damage from over-wetting foam or inner stuffing
- Colour loss caused by harsh chemicals or aggressive rubbing
- Texture damage such as pilling, flattening, or roughening
- Odour problems when moisture gets trapped and dries slowly
There's also a practical side. If a DIY clean makes the upholstery look worse, you may end up paying more later for stain removal or specialist upholstery care. If you'd rather understand the safer route first, it can help to look at professional upholstery cleaning and related services such as sofa cleaning, especially when the fabric is delicate or heavily used.
How Common mistakes that damage upholstery during DIY cleaning Works
To clean upholstery properly, you need to work with the fabric, not against it. Most damage happens when people skip the basics: identifying the material, testing a hidden area, using too much liquid, or applying the wrong kind of agitation.
At a simple level, upholstery cleaning works by loosening dirt and removing it without pushing contamination deeper into the fabric. That sounds easy, but the upholstery structure makes it trickier than wiping a table. If you scrub hard, fibres can fray. If you soak the fabric, moisture can sink into the padding. If you use too much detergent, residue can stay behind and attract more dirt later.
Different upholstery materials react differently:
- Cotton and linen blends can stain or wrinkle if over-wet.
- Microfibre may water-spot if cleaned unevenly.
- Wool blends can shrink or felt if treated too aggressively.
- Velvet and suede-like fabrics can crush or mark easily.
- Synthetics are often more forgiving, but not indestructible.
That's why professionals often start with fibre identification and spot-testing. It's the boring bit, honestly, but it saves the drama. A clean cloth and patience do more for upholstery than a strong product and a determined elbow.
When a homeowner makes a mistake, it often follows the same pattern: they see a stain, panic slightly, and try to fix it quickly. That moment of urgency is where the trouble begins.
Key Benefits and Practical Advantages
Getting DIY upholstery cleaning right offers more than a tidy-looking sofa. It protects the furniture you already own and helps you avoid making wear and tear worse than it needs to be.
- Better appearance for longer - fabric stays brighter, smoother, and more even in tone.
- Fewer accidental marks - no tide lines, water rings, or sticky residue.
- Longer upholstery life - gentler cleaning preserves fibre strength and structure.
- Improved hygiene - dust, crumbs, and everyday grime are removed properly.
- Lower replacement costs - a well-kept sofa or chair lasts years longer.
There's a quieter benefit too: confidence. Once you know what not to do, cleaning stops feeling like a gamble. You can tackle small spills calmly instead of making decisions in a hurry with a half-damp tea towel in your hand.
If the upholstery is already showing stubborn marks, it may be worth considering specialist stain removal rather than increasing the risk with repeated DIY attempts. Likewise, if your furniture includes curtains or rugs in the same room, similar care principles apply to curtain cleaning and rug cleaning too.
Who This Is For and When It Makes Sense
This topic matters to anyone who owns fabric furniture and wants to keep it looking respectable without creating new problems. That includes renters, homeowners, landlords, pet owners, parents, student households, and small businesses with waiting-room seating or office soft furnishings.
DIY upholstery cleaning makes sense when:
- the mark is small and fresh
- the fabric care label allows mild wet cleaning
- you have time to dry the item properly
- the furniture is not antique, fragile, or valuable
- you understand the product you're using
It makes less sense when the item has:
- unknown fabric content
- heavy staining across a large area
- deep odour, especially from pets or mildew
- delicate trims, feather fillings, or decorative finishes
- previous cleaning damage, such as rings or colour bleed
One of the most common real-life scenarios is the "just one small spill" that turns into a larger damp patch because the person keeps adding water. You've probably seen it. The stain disappears for a moment, then reappears wider than before. Not ideal.
For pet-related mess, especially urine or odour that's already soaked into the filling, take a cautious approach and consider professional pet stain odour removal rather than layering products on top of each other.
Step-by-Step Guidance
Here's a safer way to approach DIY upholstery cleaning without rushing into the most common mistakes.
- Check the care label first. Look for cleaning codes if they're available. These usually indicate whether the fabric is suitable for water-based cleaning, solvent-based cleaning, or only very gentle maintenance.
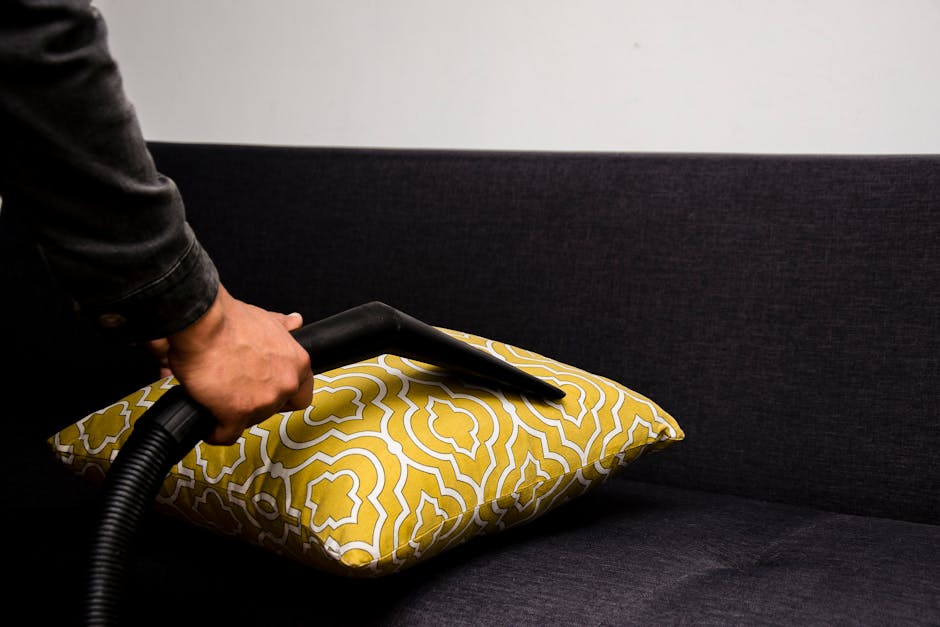
- Vacuum thoroughly. Remove dust, hair, crumbs, and grit. If you skip this, you can grind debris into the fibres and cause extra wear. A soft upholstery attachment is best.
- Test in a hidden spot. Wait for the patch to dry fully before judging the result. Colour changes can show up later, which is a nuisance but better than learning that on the front cushion.
- Use the mildest effective product. A little goes a long way. Start gentle and only step up if needed.
- Apply sparingly. Spray lightly onto a cloth rather than directly soaking the fabric, unless the care instructions clearly allow otherwise.
- Blot, don't rub. Press the stain area with a clean cloth and lift it out gradually. Rubbing often spreads the mark and roughens the surface.
- Work from the outside in. This helps stop the stain edge from widening.
- Remove residue. If you use cleaning solution, follow with a lightly damp cloth where appropriate so you don't leave detergent behind.
- Dry quickly and evenly. Open windows if possible, use airflow, and avoid sitting on the item until it is fully dry.
- Brush or reset the pile if needed. Some fabrics benefit from gentle grooming once dry, especially textured materials.
If you're cleaning more broadly around the home, it's useful to compare this with methods used in carpet cleaning or even steam carpet cleaning, because the principles are similar: correct method, controlled moisture, and proper drying. Same idea, different surface. Different headache if you get it wrong.
Expert Tips for Better Results
Small details separate a decent clean from a damaging one. In our experience, most good results come from restraint. That's not the glamorous answer, but it's the real one.
- Use white cloths, not coloured ones. Dye transfer is one more thing you do not want to deal with.
- Work in sections. It helps you control moisture and avoid patchy drying.
- Keep the cleaning area small. A sofa arm is easier to manage than the entire seat cushion at once.
- Mind the seams and piping. Liquid collects there and can leave dark edges.
- Don't chase every faint mark. Sometimes repeated cleaning makes the surface look worse than the original blemish.
- Let dry time lead the process. If you rush, you may trap moisture and create odour later in the day.
A useful rule of thumb: if you need to scrub hard, the method is probably too aggressive for the fabric. And if the room starts smelling like damp detergent by evening, the clean has gone sideways.
For general furniture upkeep, choose the right approach for the item itself. A living-room sofa, for example, often needs a different level of care than a dining chair or footstool. If the piece is deeply used, a proper sofa cleaning approach may be far safer than a quick spot treatment.
Common Mistakes to Avoid
This is the heart of it. These are the mistakes that most often damage upholstery during DIY cleaning, even when the intention was perfectly reasonable.
1. Skipping the care label
The care label tells you whether the fabric can tolerate water, solvents, or only minimal cleaning. Ignoring it is a bit like guessing the recipe halfway through baking. It may work once. Or it may not. If you don't know the fabric code, be more cautious than usual.
2. Using too much water
Over-wetting is one of the biggest causes of upholstery damage. The surface might dry, but moisture can sit underneath in the padding. That can create odours, slow drying, tide marks, and even mould risk in some conditions. A lightly damp cloth is usually safer than a soaked sponge.
3. Scrubbing stains aggressively
Scrubbing can spread the stain, fuzz the fibres, and distort the weave. It can also drive the spill deeper. Blotting is slower, yes, but it is much kinder to the fabric.
4. Using the wrong cleaner
Bleach, strong alkaline products, and harsh degreasers are risky on upholstery. They may lift colour, leave residue, or damage a fabric finish. A cleaner that works on a kitchen counter may be terrible on a sofa. Different job, different rules.
5. Not testing first
Spot-testing in an invisible area is simple and often skipped. That's a mistake. A product can change colour, leave a ring, or roughen the pile after drying. Always test first if there is any uncertainty.
6. Overusing detergent
More cleaner does not mean better cleaning. Too much detergent can leave the fabric tacky, attract dirt faster, and make rinsing difficult. If you've ever cleaned a patch only for it to feel slightly sticky later, residue is probably the culprit.
7. Rubbing the stain with a rough cloth
Texture matters. Coarse towels, scourers, and abrasive cloths can mark delicate fabrics. Use a soft white cloth and gentle pressure instead.
8. Drying too slowly
Slow drying is a sneaky problem. It gives odours time to develop and can cause water marks. Airflow is helpful, and warmth can help too, but avoid anything too hot or too close to the fabric.
9. Cleaning only the visible patch
If you treat one tiny spot and stop, you may leave a bright clean circle surrounded by dingy fabric. That contrast is more visible than the original mark. Often, a larger blended area is better.
10. Ignoring odour after the surface looks clean
Sometimes the stain disappears but the smell remains. That usually means moisture or contamination is still in the filling. Surface cleaning alone won't solve that, and repeated wetting can make it worse.
11. Using coloured towels or paper that sheds
Lint and dye transfer are avoidable annoyances. Yet they happen all the time. Use clean, white, lint-free cloths where possible.
12. Trying to rescue antique or delicate upholstery on instinct
Older furniture, silk-like fabrics, and fragile trims deserve caution. DIY can be risky here. If the item matters a lot, or if the fabric is unusual, get advice before you start. A wrong move on an heirloom is not a good afternoon.
| Mistake | What it can cause | Safer alternative |
|---|---|---|
| Over-wetting the fabric | Water rings, slow drying, odour, padding damage | Use minimal moisture and blot carefully |
| Scrubbing hard | Fibre distortion, pilling, stain spread | Blot with gentle pressure |
| Using strong chemical cleaners | Colour loss, residue, fabric weakening | Choose a fabric-safe, mild product |
| Skipping a test patch | Unexpected fading or texture changes | Always spot-test first |
| Drying too slowly | Musty smell, tide marks, damp filling | Improve airflow and dry promptly |
Tools, Resources and Recommendations
You do not need a trolley full of gadgets to clean upholstery well. A few sensible tools are enough for most light maintenance tasks.
- Vacuum cleaner with upholstery attachment - useful for dry soil removal before any wet cleaning
- Clean white microfibre cloths - ideal for blotting and lifting residue
- Soft brush - gentle enough to loosen dust without damaging fibres
- Mild fabric-safe cleaner - chosen according to the care label and fabric type
- Spray bottle - helps control application so you don't over-wet the area
- Dry towel - useful for pressing out extra moisture
- Fan or open-window airflow - helps the item dry evenly
Some products and tools simply make life easier. A small upholstery brush, for example, is often more effective than a stiff household brush. And a vacuuming pass before cleaning can remove enough grit to change the final result completely.
If you are maintaining a whole room of fabric surfaces, the same cautious attitude applies to mattress cleaning and even large rugs. The goal is always the same: lift soil without flooding the material.
For readers comparing their options, the company's pricing and quotes page can help set expectations before booking a service, and the about us page provides more background on the business approach and service standards.
Law, Compliance, Standards, or Best Practice
There is not usually a special legal rule for cleaning a sofa at home, but there are still sensible UK expectations around safety, product use, and responsible maintenance. The key point is simple: use products as intended, follow the manufacturer instructions, and avoid creating a hazard for people or the property.
Best practice in upholstery care usually means:
- following care labels and manufacturer guidance
- using products in a well-ventilated space
- keeping cleaners away from children and pets
- avoiding mixtures that could react badly, especially bleach-based combinations
- allowing full drying before use
If you're in a shared building, rented home, or commercial setting, it is also wise to avoid leaving damp furniture in a way that could affect others. In commercial environments, this matters even more because seating may be used all day and downtime can be costly. For that kind of setting, a professional commercial carpet cleaning mindset often extends to all soft furnishings: careful scheduling, controlled moisture, and clear drying time.
Safety also matters from a practical point of view. If a product is strong enough to irritate your skin or eyes, it deserves respect. A tiny splash on a cushion may not seem dramatic, but your lungs, the fabric, and the room's air quality all matter. A little common sense goes a long way here.
Options, Methods, or Comparison Table
There is no perfect method for every piece of upholstery. The best choice depends on the fabric, the type of mark, and how much risk you're willing to take.
| Method | Best for | Main risk | Overall view |
|---|---|---|---|
| Dry vacuuming | Routine maintenance, dust, crumbs, pet hair | Very low risk if used gently | Best first step for almost every item |
| Spot cleaning with a damp cloth | Fresh marks and small localised stains | Water rings if overused | Useful if done carefully |
| Foam or fabric cleaner | More stubborn surface dirt | Residue, colour change, over-application | Needs testing and restraint |
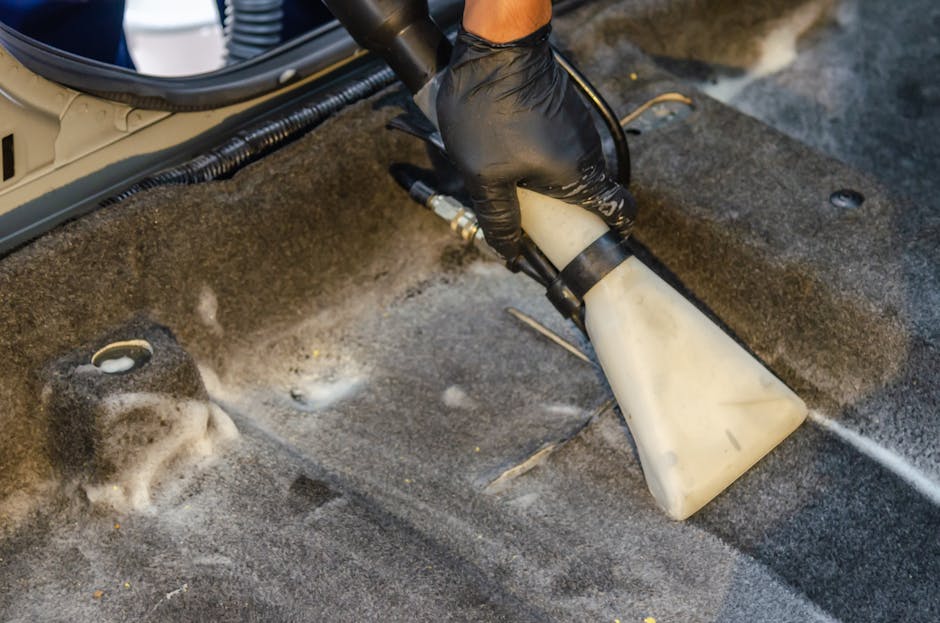
| Steam-based cleaning | Some durable fabrics, deeper refresh | Heat and moisture damage on sensitive fabrics | Only suitable when the fabric allows it |
| Professional upholstery cleaning | Delicate, valuable, or heavily soiled items | Lower risk when performed correctly | Often the safest option for tricky jobs |
For many households, the smartest path is a mix of methods: vacuum regularly, treat tiny spills promptly, and avoid turning every mark into a wet-cleaning project. That balance saves time and stress. And yes, a lot of stress.
Case Study or Real-World Example
A typical example: a family notices a coffee mark on the arm of a light-coloured fabric sofa on a Saturday morning. They blot it once, then reach for a stronger cleaner, then add more water because the first pass did not look dramatic enough. By late afternoon, the original stain is smaller, but there is now a faint ring and a slightly flattened patch around it. The smell is damp, the fabric looks patchy, and the family is frustrated because the problem now feels bigger than the spill.
What would have worked better?
- blot immediately with a dry white cloth
- check the care label before using anything wet
- spot-test the cleaner in a hidden area
- use only a small amount of solution
- press, lift, and repeat rather than scrubbing
- dry the area with airflow, not impatience
In cases like that, the second problem is often caused by the "fix" itself. That's the tricky bit with upholstery. The effort to improve the visible stain can quietly damage the overall finish. If the issue involves a larger area or an odour that lingers, specialist help is usually the safer decision. For stubborn localised marks, the team's stain removal service may be a better fit than a repeated DIY attempt.
And if you need a clear starting point for a more serious clean, you can always compare it with the general approach used for upholstery cleaning. The difference between a quick fix and the right process can be surprisingly large.
Practical Checklist
Use this checklist before you clean upholstered furniture at home.
- Check the care label and fabric type
- Vacuum thoroughly first
- Choose the mildest suitable cleaner
- Test the product in a hidden area
- Use as little moisture as possible
- Blot stains gently instead of rubbing
- Work from the outer edge towards the centre
- Remove excess product and residue
- Dry with good airflow
- Wait until fully dry before using the furniture again
- Stop if colour changes, fabric distortion, or odour appears
Expert summary: The safest DIY upholstery clean is usually the one that looks slightly underwhelming while you are doing it. That is not a joke. The fabric stays intact, the stain lifts gradually, and you avoid the classic over-wet, over-scrubbed, over-regretful result.
Conclusion
The most common mistakes that damage upholstery during DIY cleaning are usually simple ones: too much water, too much scrubbing, the wrong cleaner, and not enough drying time. None of those errors looks dramatic at first, which is why they catch people out. The sofa seems fine while it is still damp. Then, a few hours later, the ring appears. Or the texture changes. Or the smell lingers. That's when the real problem shows itself.
With a careful approach, you can handle many minor spills and general upkeep at home. The key is to work gently, test first, and know when a job has moved beyond safe DIY territory. If the fabric is delicate, the stain is stubborn, or the furniture is important to you, getting help is often the wiser move. No drama. Just a smarter outcome.
If you are comparing your options or want a better sense of what professional care can involve, explore the service pages for upholstery, sofas, and stain treatment before making a decision.
Get a free quote today and see how much you can save.
Sometimes the best cleaning decision is the calm one. A little care now can save a lot of grief later, and your furniture will thank you for it in its own quiet way.
Frequently Asked Questions
What is the biggest mistake people make when cleaning upholstery at home?
The biggest mistake is usually over-wetting the fabric. Water can sink into the filling, leave rings, and create odours or slow-drying damage. Scrubbing too hard is a close second.
Can I use washing-up liquid on upholstery?
Sometimes a very diluted solution may be acceptable for some fabrics, but it is not a universal fix. It can leave residue and attract dirt if used too heavily, so always check the care label and test first.
Why does my sofa look worse after I cleaned it?
That usually happens because of residue, water marks, colour disturbance, or pile flattening. The stain may be gone, but the fabric around it has been affected by the cleaning method.
How do I know if upholstery is safe to clean with water?
Look at the care label. If the label is missing or unclear, assume the fabric needs caution. When in doubt, use the least wet method possible and test in a hidden area.
Is steam cleaning safe for all upholstery?
No, not at all. Some fabrics tolerate steam better than others, but sensitive materials can be damaged by heat or moisture. Always confirm suitability before using steam on upholstery.
Should I clean the whole sofa or just the stain?
It depends on the mark and the fabric. Cleaning only one small area can leave a visible patch, while treating a broader section may blend better. The safest choice is the one that avoids uneven results.
What should I do if the upholstery smells damp after cleaning?
Improve ventilation immediately and allow the item to dry completely. If the smell remains after drying, moisture may have reached the filling. That is a sign to stop repeated wet cleaning.
Can rubbing a stain make it permanent?
Yes, it can. Rubbing may spread the stain, damage the fibres, or push contamination deeper into the fabric. Blotting is usually much safer.
How often should upholstery be cleaned?
There is no single schedule. Light vacuuming can be done regularly, while deeper cleaning should be based on use, spills, pets, and the fabric type. High-use sofas need more attention than spare-room chairs.
When should I stop DIY and call a professional?
Stop if the fabric changes colour, feels sticky, dries unevenly, or still smells after cleaning. Also stop if the item is antique, expensive, or made from a delicate fabric you are unsure about.
Are homemade cleaning mixtures better than store-bought ones?
Not necessarily. Homemade mixtures can be unpredictable on upholstery, especially if the ratios are guesswork. A fabric-safe product used carefully is often the safer option.
Does vacuuming really make a difference before wet cleaning?
Yes. Removing loose dirt first prevents grit from being pushed deeper into the fibres and helps the wet clean work more effectively. It's a small step with a surprisingly big payoff.
If you want, the safest next step is to start gently, test carefully, and only increase the level of cleaning if the fabric clearly allows it. That sensible middle ground is often where the best results live.